Here I will show you how to create a Facebook event for your page.
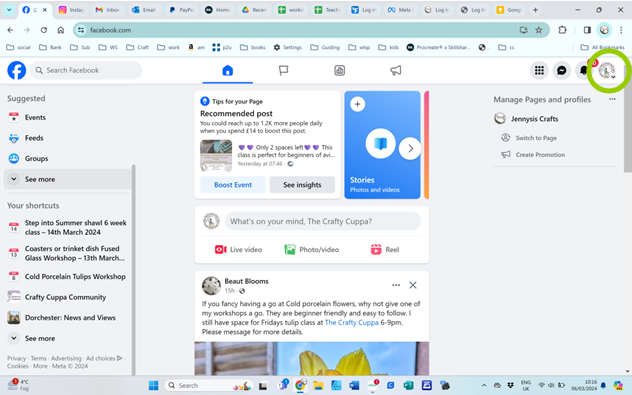
1 – Go to Facebook in a browser window. I am using a laptop here as I find admin on my page works better that way as many features seem to be be hidden on the apps.
First make sure you are logged into your page. to do this click on the profile picture in the top right corner as shown below and click to select your page.
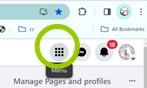
2 – Select the button with 9 dots close to the profile icon.
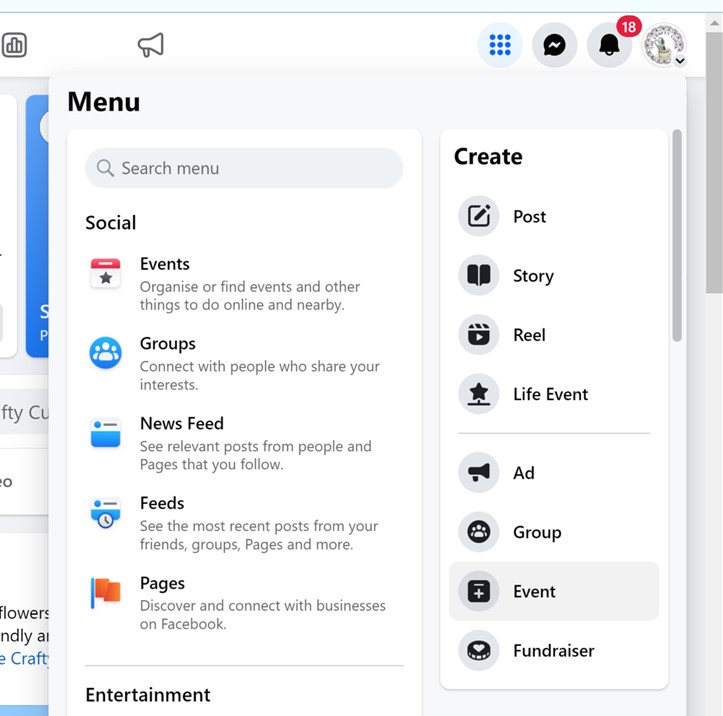
3 – The drop down menu will give you various options. Select Event under the righthand side of the menu headed as create as indicated below.
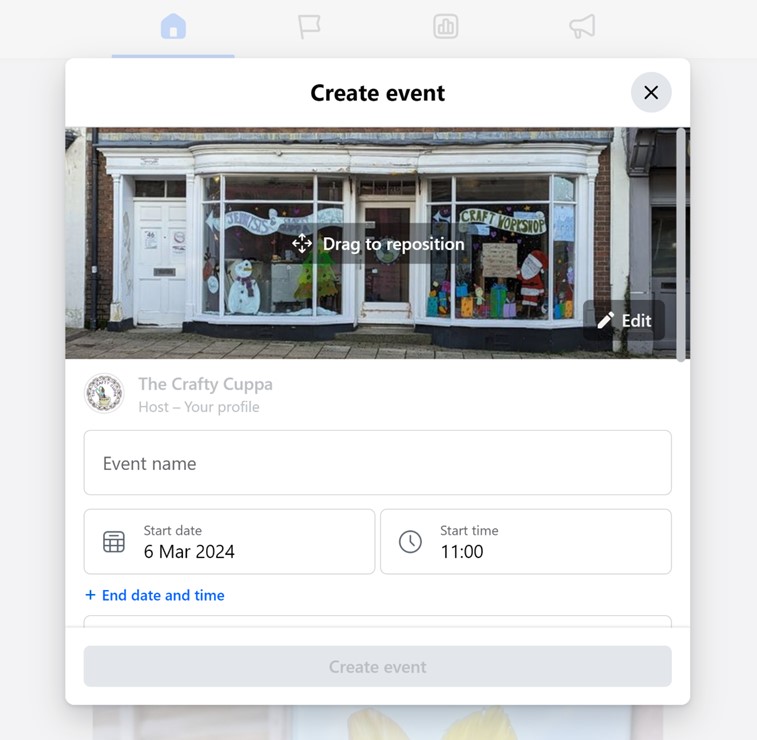
4 – A pop up box will appear headed Create Event. This is where you will need to add information.
First select an image by clicking edit on the photo at the top. It automatically picks the header photo for your page so it’s good to change it to something that is relevant to the event. This also makes it easier for you to find when looking through your events.
5 – Make sure to add an event name. This is what people will see first so make sure if describes the event in as few a words as possible.
6 – Add a date for the event. To do this click on the date box and a menu will pop up, you can change the month or year in the pop up boxes above the calendar.
7 – Add a time. The options are in 15 minute increments. Make sure to click the + End date and time wording in blue so you can include the end time.
8 – Next add a description. This needs to reveal information about the event including cost, how to book, location, parking, what you will do, instructions for when arriving, things needed to be bought, special clothing requirements etc etc.
9 – Add a location. Start to write the address in the field and it should come up. for the Crafty Cuppa add 46 High East Street, DT11HU
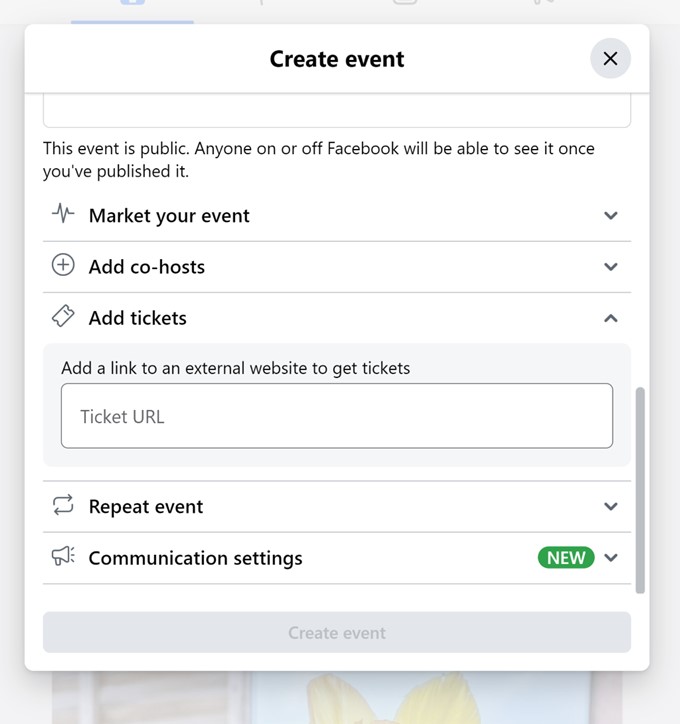
10 – Once the fundamentals are in place you can add other elements.
You can add The Crafty Cuppa as a co-host so it should be available to view on my page.
If you have created a listing on Eventbright or a website you can add the URL under Add Tickets. This is also a place to add a PayPal link button or a Facebook page. Do remember however that people don’t like to search for information so the link should make it as easy as possible to book a place on your event. You can’t put an email in here. if you wish people to email you then make it clear in the details section that booking are taken via email or even phone if you wish.
Once you have filled in you details, date and description fields then the create event box will turn green. Double check you have done everything you wanted before creating. (you can edit at a later date so don’t panic too much but as soon as it is created it will post on your Facebook page so best to try to get it right first time.
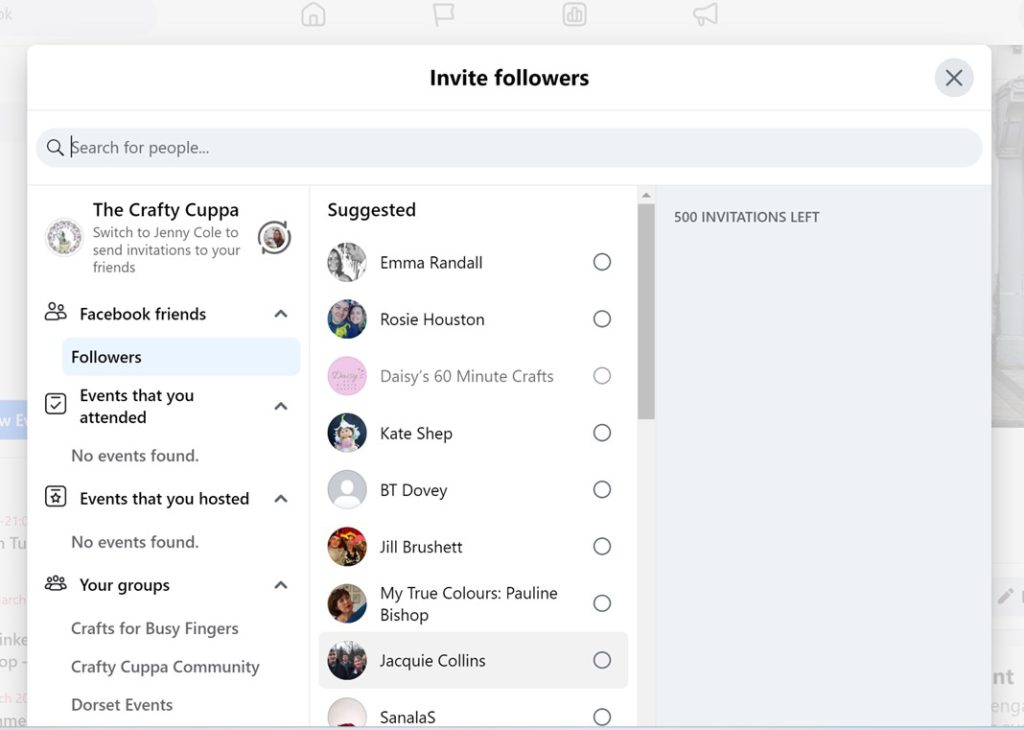
Once you hit Create you will get another pop up come up giving you the option to invite people to the event. I usually just click out of this box (cross in top right corner) so I can share once I am ready.
So you’ve posted your first event!!! Yay!
Now what if you want to view your events or change one??
Go back to your original screen. I do this by clicking on the Facebook logo in the top left corner and then double checking which profile I am in like in step one above (top right corner icon)
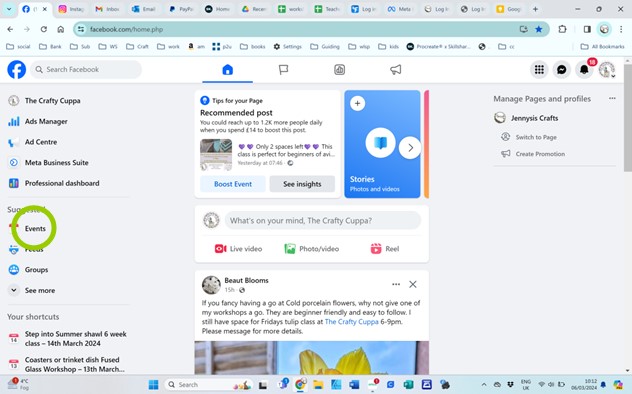
Now if you look in the menu on the left hand side you will see a variety of shortcuts. Yours may look a little different as these lists are often populated depending on how often you use certain functions in your page.
Above you can see that I have Events in my suggested section of the menu. If you don’t find it there select see more just below and it should come up there. (If not feel free to pop me a message)
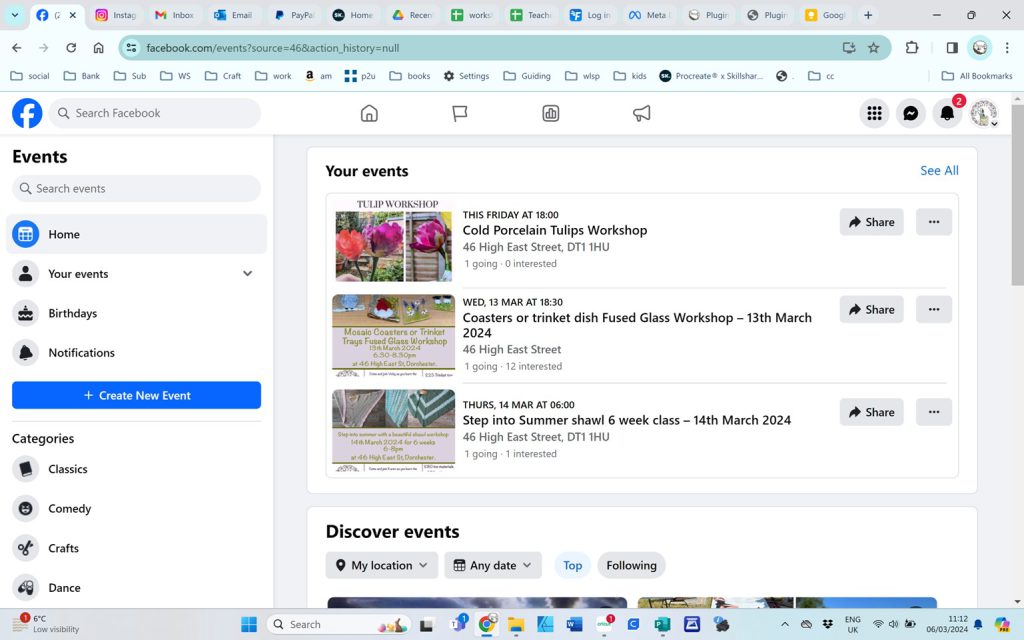
Select Events and you should then see this page.
Here you can see some events I currently have listed as well as a menu for other categories within this section.
Now if you wish to share or cancel an event click on the three dots next to the event (if you can’t see a particular event as you may have more than 3 events then click See All first)
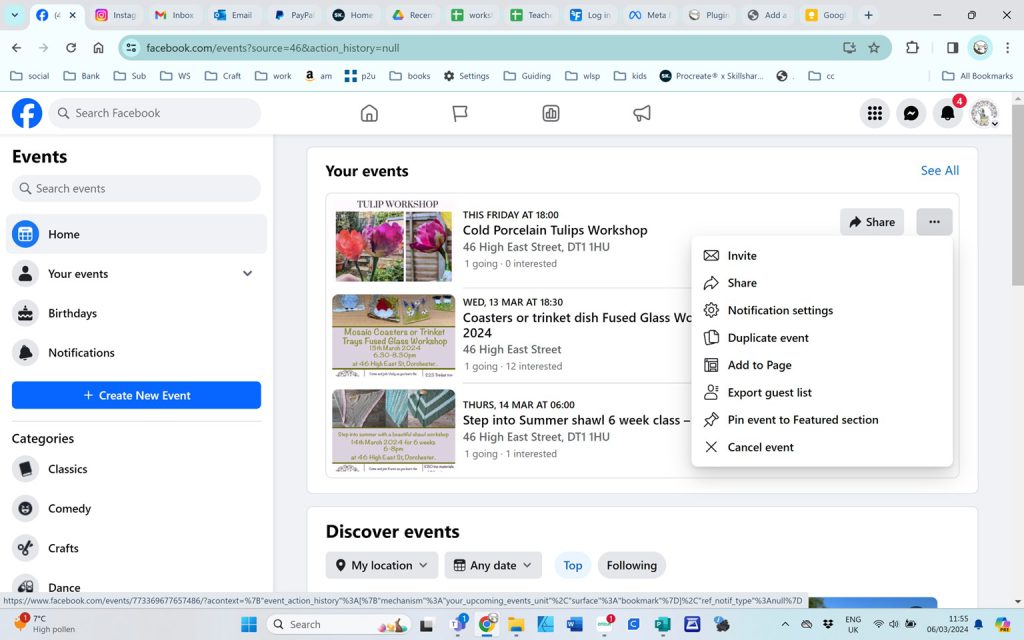
You can see there are a variety of options available to you once you click the three dots.
Invite – you can invite individuals to your event like the option seen after you created your event.
Share – This will give you an option to share to your page, a group or even email a link to your event
Notification Settings – When you create an event you create a mini page where people including yourself can post updates and information. in these settings you can choose what notifications you will get if anyone comments.
Duplicate event – This can be handy if you are repeating the event or something similar, it will basically copy it and then you can go in and change the date or another details. Saves lots of work if you are listing lots of events.
Add to page – This will add the event into you pages events section (To be honest I assumed it did this anyway but obviously not)
Export Guest list – When an event is published then people can indicate whether they are going or interested. if you click this option a spreadsheet will automatically download showing you the names of those who have chosen either option and what option they chose. Personally I wouldn’t use this as a definitive guide. People are unlikely to remember to return and select going after booking. However if people do click going or even interested they will get an automatic reminder that the event is coming.
Pin event to featured Section – Click this and it will automatically be pinned to the section. I have yet to see where this is but I suspect it is when someone other than an admin view the page and it is pinned in a side menu or at the top of your feed.
Cancel Event – Don’t panic if you press this by mistake, it will just take you to another menu. Ok so you get two options here. Cancel is useful if you have had to cancel and people were interested and you wish to explain why it is cancelled. (there is place to add your comments if you cancel) I put a couple of events in more than once and in that case delete was what I needed. It deletes all trace of that event. Make sure you are sure you want to delete when you select it as it isn’t reversable, you will need to redo it if it was a mistake.
If you wish to edit an event then click on the event rather than the three dots. This will take you to that particular event. Here you can see there is an edit option as indicated below.
Edit will take you back to the pop up screen you had when you created the event. Now make your alterations and click Save once you are finished.
When you have created your event for a class coming up at the Crafty Cuppa then don’t forget to share a link with me so it can be shared.
Hope that all makes sense and if you have any queries don’t hesitate to get in touch jen@craftycuppa.uk